


React Native is a very popular choice among developers to build mobile applications. Especially when you want to write code once and it runs on Android as well as IOS. Installing and setting up a React native app sometimes becomes tricky when steps are not followed correctly. Here in the blog, I will simplify the process for you.
Firstly you need Nodejs, Android Studio, and Java Development Kit to get started. To install nodejs in your computer visit https://nodejs.org/en/download/current site to install the latest version of nodejs.
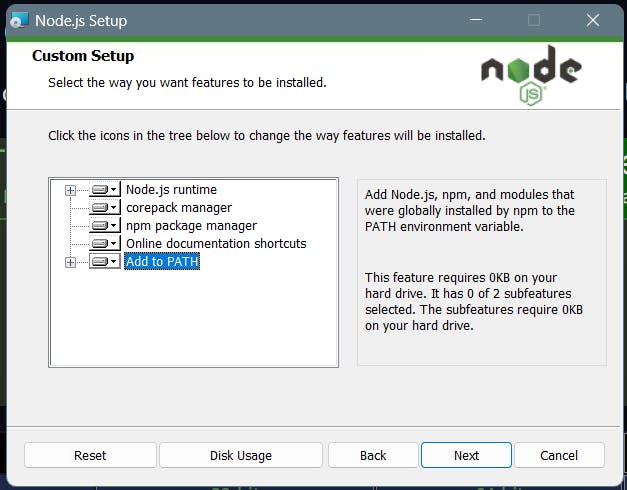
Ensure that Add to PATH is selected while installing as shown in the above image.
Then we need JDK, for that visit the official website of Java owned by Oracle. Visit https://www.oracle.com/in/java/technologies/javase/jdk11-archive-downloads.html and click the release suitable for your operating system. Remember to install the JDK11 else react native won't work correctly and will throw errors at a later stage of setup.
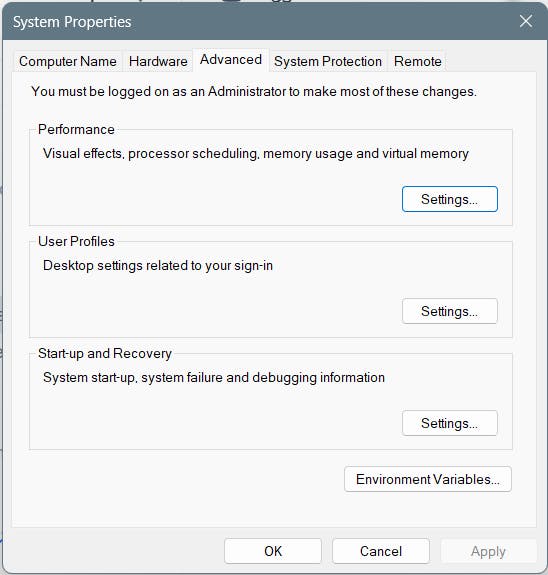
Now is the time to set environment variables for JDK. Firstly open Environment Variables by clicking on the button in the image below.
Now search through the Program files inside C drive to find Java. Now set new variable inside system variables named JAVA_HOME whose value will be the path as I have shown in the image below (also verify the same in your case).
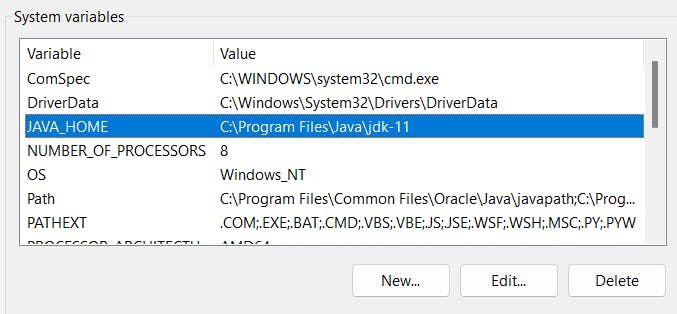
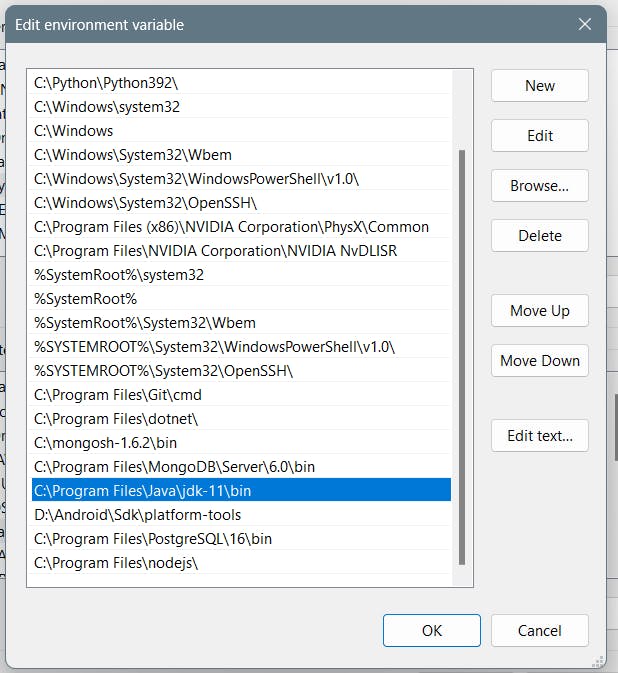
Note that the path can differ, be cautious while setting up the path. Now click on the Path field in system variables and click on Edit... Now click on New and paste the path to the table.
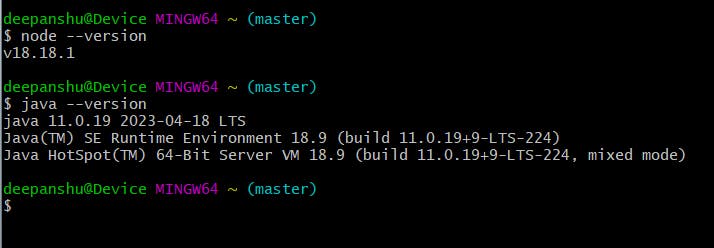
Now we have successfully set up JDK11 on our PC. You can check it and nodejs by typing the following command in your command prompt.
Let's now jump to the last installation part and the most tricky of all, the Android Studio. Note that to develop the app you don't necessarily need 16 GB of RAM. It can also work properly on an 8 GB RAM computer. We will discuss that later.
To install Android Studio, visit https://developer.android.com/studio and download the file. After completely installing Android Studio, locate SDK Manager in the options menu.
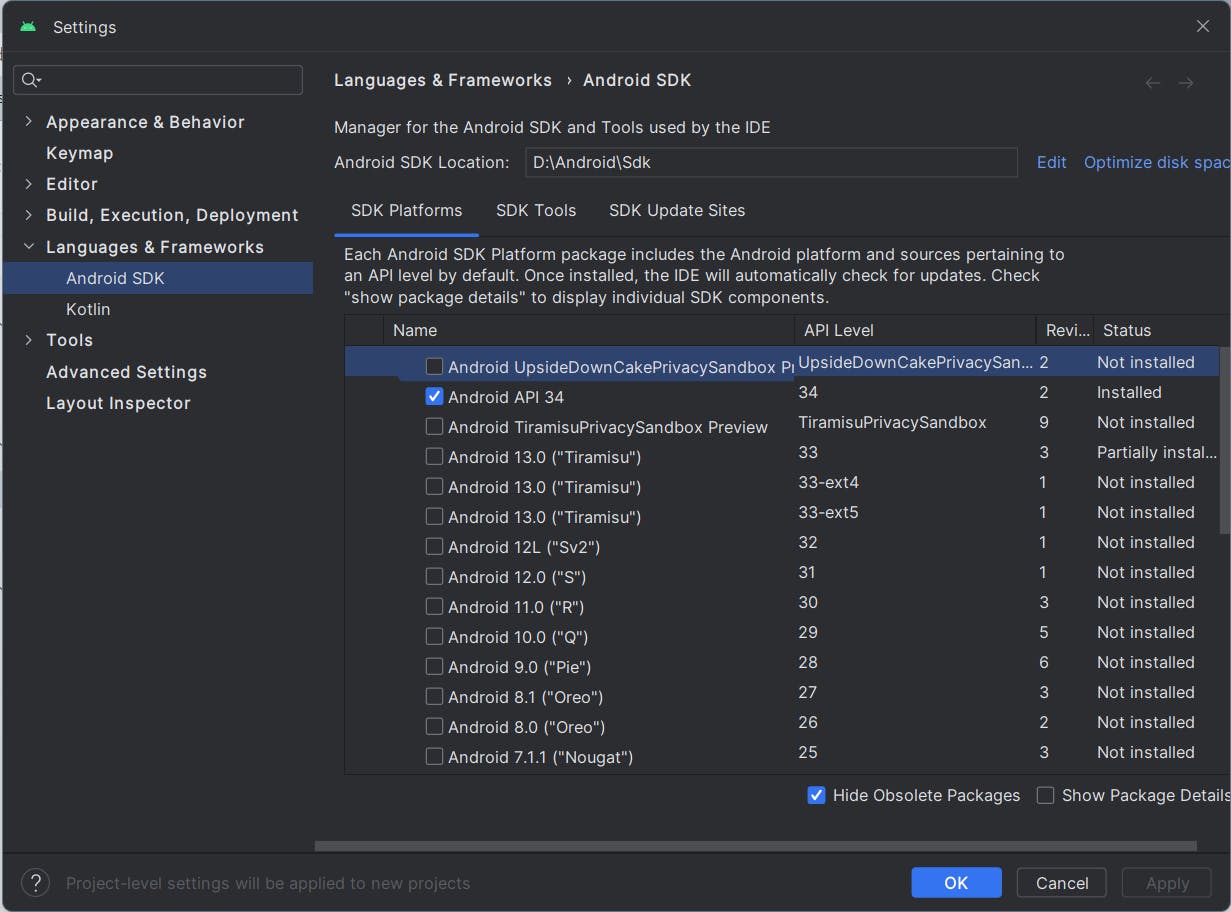
Install the Android API as shown in the image. It's generally preferred to install one version back than the latest one. In my case, API 34 was present for a long time, so it worked. Also, click on the SDK Tools tab from above and select Android SDK Build-Tools, Android Emulator, and Android SDK Platform-Tools. Google Play Licensing Library is optional, depending on if you will publish your app on PlayStore in future. Then at last click on Apply.
Also if you want to run your mobile app on your PC you need to select Virtual Device Manager from the option menu on the home page and then click on the Create Device button to create your preferred device on your PC. After it select the API level you want to install, click Next and finish the setup.

If you are struggling with low RAM on your PC, then you don't necessarily need to install a virtual device rather you can connect your real mobile phone to your PC and start developing the app. For it, you need to enable Developer options on your mobile device and allow for USB debugging.
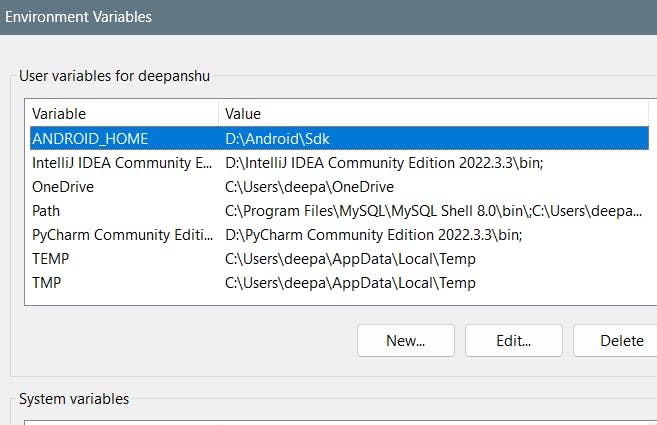
Now is the time to set some environment variables for Android SDKs. Copy the path of the SDK folder from the SDK manager and paste in the system variables and user variables named ANDROID_HOME as shown below.
Also set the path of platform tools, which are present inside Android > Sdk > platform-tools. Copy the path and paste it into the path section of user variables and system variables as in the below image. You can also add build-tools, emulator, etc from Sdk folder present inside Android folder.

Note- In my case, I installed Android Studio inside D drive, that's why my paths seem a little different from yours. But you can locate the Sdk folder from your Android Studio's SDK Manager.
Hurray😍😍, we have successfully set up the environment to build our first React native application.